Bike Camping: The Fun Way to Go!
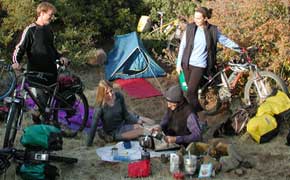
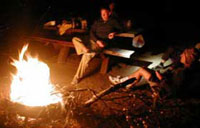
People have been using their bikes to access backcountry areas for years. In fact, John Muir himself cycled his way through Yosemite in search of nature and inspiration. If you need a little inspiration, or a change from your normal routine, check out a map, pack up your bike, and head into the hills. There’s nothing more satisfying than rolling into camp after a day in the saddle, gathering wood for a fire, cooking up dinner and relaxing under a glittering canopy of stars.
Bike camping is about escaping, about being off the beaten path, riding somewhere you could never get in just one day. It's an antidote for stress and one of the most affordable ways to travel. Plus, today's bicycles are reliable and easier to ride than ever. Easy gears make climbing a breeze and powerful brakes let you coast down hills with complete control. Bicycling never felt so good and with little effort you can explore to your heart's content.
Before you head out into the great, wide open, however, we'd like to offer a few basic tips.
Choose Your Route
When planning your ride the best maps are usually available from your local Forest Service Headquarters. Carefully consider the length of your route. A distance of about 20 to 25 miles a day gives you plenty of time to ride, sightsee, and explore, and still have time to set up camp and gather firewood.
It's very important to think about water sources. Unless you can carry all your water for the duration of the trip, you’ll need to make sure there’s a water source on the route. Ideally it'll be close to your campsite, but this isn’t essential. Dehydration is no fun, but a morning without a cup of coffee is unthinkable! 
Next, keep in mind that because you’ll be carrying all your gear, singletrack climbing is probably not the way you want to spend your days. Remember this rule: climb fire roads and descend trails. Finally, remember to ask around about trail and road conditions before setting out, too.
Gear And How To Pack It
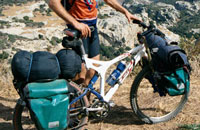
Bike camping gear is no different than what you’d need for any other camping trip, with a few considerations. The first decision is whether to use pannier racks and bags (photo) or to use a cargo trailer. Depending on what you choose, you’ll need the proper type of bag to pack your gear. For racks, you’ll use panniers, which hook onto the upper rails of your rack and also attach to points near your axles. Most panniers come only in sets and you’ll need to think about how much room you need before you buy (to get an idea, it helps to lay all your gear out on the floor).
If you decide to use a trailer, you should consider getting the specially made duffel sacks that fit directly into the cargo bin. Here’s a hint: if you use a trailer, you may want to consider also using a front rack and bags to help balance your load. Trailers weigh about 17 to 20 pounds. Add 30 to 40 pounds of gear and suddenly your bike has some serious handling issues. A front rack and bags can help distribute the load and keep your bike under control.
The other consideration when bike camping is what repair tools you should bring. Obviously this varies according to the type of bicycle you're riding and how it's equipped. You will need at least, a pump, tire levers, spare tube, patch kit, all-in-one tool (that includes a chain tool and spoke wrench) and a knife. Being equipped for emergencies is important because when you're 2 days from home, so is the rescue team!
Once you’ve spent a few days living off your bike in the great outdoors you’ll be hooked! If you have any questions on how to get started or equipped for bicycle camping, please ask!